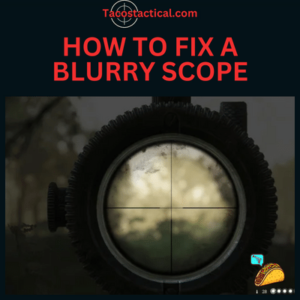
Have you ever been out hunting and found your scope wasn’t clear? You know it’s something wrong with the scope, but how do you fix it? Blurry scopes can be difficult to adjust, but with a few simple steps, you can get your scope back in action. Here’s how to fix a blurry scope for good.
The first step is to check the focus on the eyepiece. Turn the eyepiece so that it’s in line with the lens and then twist it until the image is as clear as possible. You may need to adjust it several times before you find the right fit. Make sure not to over-tighten or loosen too much or else you could damage your scope.
After adjusting the eyepiece, check if there are any obstructions preventing light from getting into the scope. If something has fallen in front of the lens, remove it and try again. Cleaning off any dirt or dust on the lenses can also help improve its clarity. Once everything is clear, take the time to sight in your rifle again and make sure all adjustments are correct.
With these simple steps, you’ll be able to fix a blurry scope quickly and easily! Continue reading for more information about how to get your scope back into working condition.
Table of Contents
Understanding The Problem
It can be very frustrating when you are trying to use a scope and it appears to be blurry. This can happen for a variety of reasons, from the scope being out of focus to the optics being dirty or damaged. Understanding what is causing the blurriness can help you fix it.
Checking the focus is one of the first things to do. Adjust the eye piece until you have a clear image, if applicable. If that does not work, then look into whether there is something wrong with the lens or other optics. They can become foggy or scratched over time, which will cause blurriness in the image.
If cleaning and adjusting don’t solve your issue, it could be time to replace parts of your scope. Make sure you know exactly what needs replacing and have all necessary tools before beginning this process. Moving on to preparation and safety…
Preparation And Safety
Before you begin any repairs or replacements on your scope, it is important to prepare and take safety precautions. This will help ensure that no further damage is done and that you don’t harm yourself in the process. Here are a few steps to take before you start:
- Gather all the necessary tools for the job, such as screwdrivers, pliers and cleaning supplies.
- Make sure the area is well-lit so you can see clearly what you are doing.
- Wear protective eyewear while working with small parts or sharp tools.
Be sure to read the instructions that come with your parts carefully, as they can vary depending on the model of scope you have. Make sure each step is completed correctly so that when it’s time to put everything back together, it will work properly again.
Now that we have taken the appropriate preparation steps for our scope repair, let’s move on to some troubleshooting tips…
Troubleshooting Tips
Troubleshooting the source of a blurry scope can be like trying to find a needle in a haystack. But with careful observation and patience, you can get to the bottom of the issue.
First, inspect the lens for dirt or debris that may have accumulated over time. This could be causing light to scatter, resulting in a blurred image. Look carefully at each lens and consider using a magnifying glass for better inspection.
Second, check if the eyepiece is loose or not properly adjusted. Loose eyepieces can cause the scope to lose focus, resulting in blurry images. Make sure all screws are tightened down properly and that the eyepiece is securely adjusted in place before proceeding further.
Third, make sure your scope has been calibrated correctly according to manufacturer instructions. If it has not been set up properly, then it will likely result in a distorted image when looking through it. Be sure that all settings are correct before continuing with repairs.
Fourth, examine any mechanical parts such as gears and shafts for signs of wear or damage which could interfere with performance. If needed, replace any worn out parts to ensure proper functioning of your scope’s optics system.
Finally, look into replacing worn out or broken lenses as they may also be contributing to your problem. Make sure you buy replacement lenses that are compatible with your model of scope otherwise they won’t fit properly and might cause further issues down the line.
With these troubleshooting tips in mind, we can now move on to cleaning our lenses for optimal performance…
Cleaning The Lenses
Cleaning the lenses is the next step in fixing a blurry scope. Before beginning, it’s important to make sure that all dirt and debris have been removed from the lenses. This can be done by using a soft cloth to carefully wipe away any dirt or smudges. If needed, consider using an eyeglass cleaning solution to help remove stubborn particles.
Once the lenses are clean, it’s time to adjust the focus knob. To do this, turn the knob gently until an image appears clear and sharp. Make small adjustments at first before making larger ones if necessary. It may take some trial and error before getting it just right.
Adjusting the focus knob should help bring clarity back to your scope. If not, then it could be time to look into replacing specific parts or even getting a new scope altogether.
Adjusting The Focus Knob
Once the lenses are clean, it’s time to try and adjust the focus knob. Turning the knob slowly should help bring clarity back to the scope. It may take a few tries before finding the right spot, so be patient and keep tweaking until an image appears sharp and clear. If this doesn’t work, then it may be necessary to look into replacing specific parts or even getting a new scope altogether.
To start with, check if adjusting the ocular lens will help improve clarity. To do this, simply turn the ocular lens in small increments until clarity is achieved. It’s important to make sure not to move any other adjustment knobs or lenses during this process as that can throw off the focus.
If adjusting the ocular lens does not help improve clarity, it might be time to consider replacing it entirely. This process can be quite involved and requires removing screws and other components from the scope. To ensure this is done properly, seek advice from an expert or watch tutorials online for best results.
Replacing The Ocular Lens
Adjusting a scope’s clarity is much like the process of cleaning a window. As one washes the glass, they can see through the dirt and grime to what lies beyond. Similarly, when adjusting a scope’s focus knob and ocular lens, it can be possible to bring back sharpness and clarity to an image.
In many cases, replacing the ocular lens altogether can help restore clarity. This process requires patience and precision as it involves unscrewing parts of the scope to access the lens. It’s important to make sure that all screws are properly tightened after replacing the lens, as this is vital for maintaining accuracy with the scope.
Once everything has been carefully put back together, it will be time to check that everything is aligned properly. If not, then some further adjustments may need to be made in order to get the best results from your scope.
Checking For Alignment Issues
Now that the ocular lens has been replaced, it’s time to check for alignment issues. This process requires a steady hand and patience as it involves making adjustments to the scope’s inner workings. Before beginning, you’ll need to make sure that all screws are tightly secured.
Begin by turning the focus knob until an object is in clear view. Then, take a look through the scope and see if there’s any distortion or blurriness in the image. If there is, then it’s likely that something isn’t aligned properly and needs to be adjusted.
If everything looks good, move on to inspecting for damage or wear on other parts of the scope. This includes checking for rust or corrosion on metal parts, as well as cracks or chips on plastic or glass components. Paying close attention to these details can help extend the life of your scope and prevent further issues down the road.
Inspecting For Damage Or Wear
The average rifle scope experiences a lot of wear and tear over its lifetime, so inspecting it for damage or wear is an important part of making sure it functions correctly. According to research, nearly 80% of all scope malfunctions are due to improper maintenance and care.
Before making any adjustments, take a careful look at the scope’s reticle, lenses, turrets and rings. Look for scratches, dings or any other signs of damage that could be causing the blurriness. If you find something amiss, then it might be time to replace the affected parts.
Once everything looks good, you’ll want to make sure the reticle is properly calibrated. This involves ensuring that when you turn one of the adjustment knobs, the crosshairs move in sync with your target in order to ensure a precise shot every time.
To calibrate the reticle accurately, you’ll need to use a special device such as a bore sighter or laser bore sight. These tools will help you adjust the reticle quickly and easily without having to spend hours trying to get it just right on your own.
Calibrating The Reticle
Now that the scope has been inspected and any damage has been noted, it’s time to calibrate the reticle. This is an important step in ensuring accurate shots every time.
Using either a bore sighter or laser bore sight, you’ll be able to adjust the reticle quickly and easily. You’ll want to ensure that when you turn one of the adjustment knobs, the crosshairs move in sync with your target. This will help you zero in on your target and get an accurate shot each time.
Once you’ve calibrated the reticle, it’s important to maintain its accuracy by periodically checking for wear and tear. Doing this regularly will help ensure that your scope remains functioning properly for years to come.
With a properly calibrated reticle, you’ll be ready to start avoiding future scope blur and ensuring pinpoint accuracy on every shot.
Avoiding Future Scope Blur
Once you have the reticle calibrated, it’s important to practice proper scope maintenance in order to avoid future blur. This can be done by regularly cleaning and inspecting both the interior and exterior of your scope.
The interior should be checked for dust, dirt, or debris that can accumulate over time and cause fogging or blurriness. A good way to do this is with a compressed air canister. This will help remove any buildup on the lenses or other components inside the scope.
It’s also important to keep the exterior of your scope clean as well. Mud, dirt, and even moisture can all cause your lens to fog up, making it difficult to see through your scope. A soft cloth and a lens cleaning solution is usually enough to get rid of any debris on the outside of your scope.
By practicing regular cleaning and maintenance, you can ensure that your scope remains sharp and clear for years to come.
Frequently Asked Questions
What Type Of Lens Cleaner Should I Use?
The lens cleaner – a seemingly insignificant tool, but one that can make a critical difference in the clarity of your scope. It’s easy to forget its importance, until you need it. Then, you’re stuck asking yourself: what type of lens cleaner should I use?
When it comes to cleaning and maintaining your scope, there are three main types of lens cleaners available:
- Solvent-based cleaners: These are typically alcohol or petroleum-based solutions that dissolve dirt and grime on contact. They’re effective but can also strip away any protective coatings on the lens.
- Water-based cleaners: These are non-toxic solutions and are often preferred for their gentler approach. They don’t damage lenses and can also be used for regular maintenance washes.
- Anti-fog solutions: These are specifically designed to prevent fogging by coating the surfaces with a thin film that helps disperse moisture. They’re great for use in extreme weather conditions or when using an airsoft gun inside.
Whether you’re just looking for a quick clean up or need something specialized, there’s sure to be something out there that meets your needs. Your choice will depend on how often you plan on using the scope and what kind of environment you’ll be shooting in. With a little research and some trial and error, you’ll soon find the right solution for your needs.
How Do I Know When The Scope Needs To Be Recalibrated?
Knowing when to recalibrate a scope is key to ensuring it performs at its best. Regular maintenance and cleaning are important, but these will not account for the changes in the scope caused by external forces. Here are 3 tips to help you determine if your scope needs to be recalibrated:
- Check for any signs of physical damage – dents, chips, or scratches on the lens or barrel can cause distortion in the image.
- Look at the reticle and check that it appears crisp and sharp – if it looks blurry or smudged, then the scope needs to be calibrated.
- Make sure the crosshairs line up with each other – if they appear misaligned, then it’s time for a recalibration.
Recalibrating a scope is an important part of keeping it in optimal condition. It may take some practice to get used to spotting these signs of needing calibration but doing so will help ensure that you get the most out of your scope every time you use it. Taking care of your equipment is essential for getting accurate results from your hunting or shooting activities.
Are There Any Preventive Measures I Can Take To Avoid Future Blur?
Are you tired of your scope being blurred? Do you fear that it could happen again in the future? Well, worry no more! As the old saying goes, ‘prevention is better than cure’. Here are some preventive measures that can help you avoid any further blurs.
First of all, take a look at how often you use your scope. If you’re using it too much, it’s likely to wear out faster and be more prone to blurs. So why not set yourself a limit on how often you use your scope? That way, you can rest assured that it won’t be exposed to unnecessary wear and tear.
Next, check if there are any maintenance routines or check-ups for your scope that need to be done regularly. This could involve cleaning the lens or adjusting settings so the image remains clear. By following these steps regularly, you’ll be able to keep your scope in good condition and free from blurriness.
Finally, try to store your scope in a safe place when not in use. Avoid exposing it to extreme temperatures or humidity as this can also lead to blurriness. With these preventive measures in place, you can ensure that your scope will remain sharp and clear for years to come!
Is There A Way To Check If My Scope Is Properly Aligned?
Checking if a scope is properly aligned is the first step to making sure it works correctly. Knowing how to do this can help save time and money by avoiding costly repairs. It’s important to understand the fundamentals of how a scope works and its basic parts.
Before attempting any alignment checks, make sure the power source is turned off and all lenses are clean. If there are any obstructions in the way, move them away from the scope. Then, look through the eyepiece and aim at something that’s far away, such as a distant building or tree. Adjust the focus until you see a sharp image.
Once everything is clear and in focus, use an alignment tool like a bubble level to check whether or not your scope is properly aligned with the earth’s horizon. If it isn’t, adjust it until it lines up correctly – this will help ensure accurate aiming when using your scope in future.
Are There Any Specific Tools I Need To Adjust The Focus Knob?
Adjusting the focus knob on a scope is an important task in making sure your scope is properly aligned. It can be particularly tricky to do if you don’t have the right tools. For example, imagine you’ve just purchased a brand new scope and are excited to take it out in the field for its first hunt. You arrive at your destination, set up your gear and prepare to take aim – only to discover that the image through your scope is blurry.
In this situation, it’s important to check that the focus knob on your scope is correctly adjusted. This requires specific tools like screwdrivers or Allen keys in order to make sure that everything is tightened or loosened correctly. It’s also helpful to have a good quality lens cleaning cloth so you can wipe away any dust or debris that might be affecting the clarity of your image.
So while it may take some time and effort, it’s worth investing in these tools if you want to get the best possible sight picture from your scope. Especially since a clear image can make all the difference when hunting in low light conditions. Simply put, if you’re serious about getting accurate shots with your rifle then investing in these tools will help ensure you always get a sharp view through your optics.
Conclusion
It’s important to take care of your scope if you want it to stay sharp. A good lens cleaner and regular recalibration can help keep a blurry scope from becoming a major problem. Taking preventative measures is key. Check the alignment of your scope, and make sure you have the right tools for adjusting the focus knob when necessary.
You don’t want to be left in the dark with a blurry scope – that would be like trying to find a needle in a haystack! With proper maintenance, your scope will stay as clear as day and you’ll be able to spot whatever you need to see. It just takes a bit of effort and dedication, but the rewards are worth it in the end.
So don’t let your equipment fall into disrepair – take care of it now and enjoy clear views later! With these tips, you’ll never have to worry about a blurry scope again. Life’s too short for fuzzy images – so keep your optics sharp and enjoy what’s out there!

Founder of www.calisthenics-101.co.uk. Training calisthenics since 2012.
Currently working on: 30 second one-arm handstand, muscle-up 360, straddle planche.